Showing posts with label DIY. Show all posts

Wednesday, October 2, 2013

Ruffled Crib Skirt


I'm slowly getting Molly's room decorated and the next project on the list was a crib skirt.

Of course I fell in love with some beautiful ruffled crib skirts that I saw, but I couldn't find what I wanted at a price that I found to be reasonable so I made my own!


It turned out super cute, but it was a decent amount of work.

I spent 3 weekends working on this project, although I didn't get a ton of time to devote to it.  It involved lots of cutting, pressing, and hemming.  I also don't have a ruffle foot for my sewing machine so I had to spend time gathering the ruffles by hand.

I am pretty excited by the end result though and the fact that I spent a little over $10 on the project!  I re-purposed an unused full-sized dust ruffle (by cutting it to size and piecing it together) to create the deck and panels so I only had to buy 3 yards of fabric and some thread.

I looked at a few different tutorials and then just kind of did my own thing.

Onto the next project :)


Sunday, June 23, 2013

Weekend Recap (and a Duvet Cover!)

We had a busy productive weekend.

Mark gets off work early on Fridays during the Summer (yay!) so we took advantage of his 2nd early Friday and headed to visit COSI, which had their Big Machines exhibit going on.


After a visit to the play area we spent some time walking around to check out various exhibits (we have been to the play area many times, but we had actually never been to the other exhibits at the new COSI) and then headed outside to see the Big Machines!  Jack loved the trucks and even got to operate a mini excavator!


Big stuff!

Saturday after Mark did some yard work he took over childcare duties so that I could work (mostly uninterrupted) on Jack's duvet cover.  Hours and hours, and take out pizza, and another hour or so after kid-bedtime later, it's finished!  I probably should have split the work into multiple sessions, but I didn't know when I would next get time to work on it (not to mention I lost my craft space so didn't really have anywhere to leave everything set up for an unspecified amount of time) so I ran with it.

I was so nervous about working with this amount of fabric and although I did find it challenging to make sure that everything was measured and cut properly I think it turned out really well!  I'm very happy with the end result.

Lots of fabric!  This is one 43 x 90.5" panel.

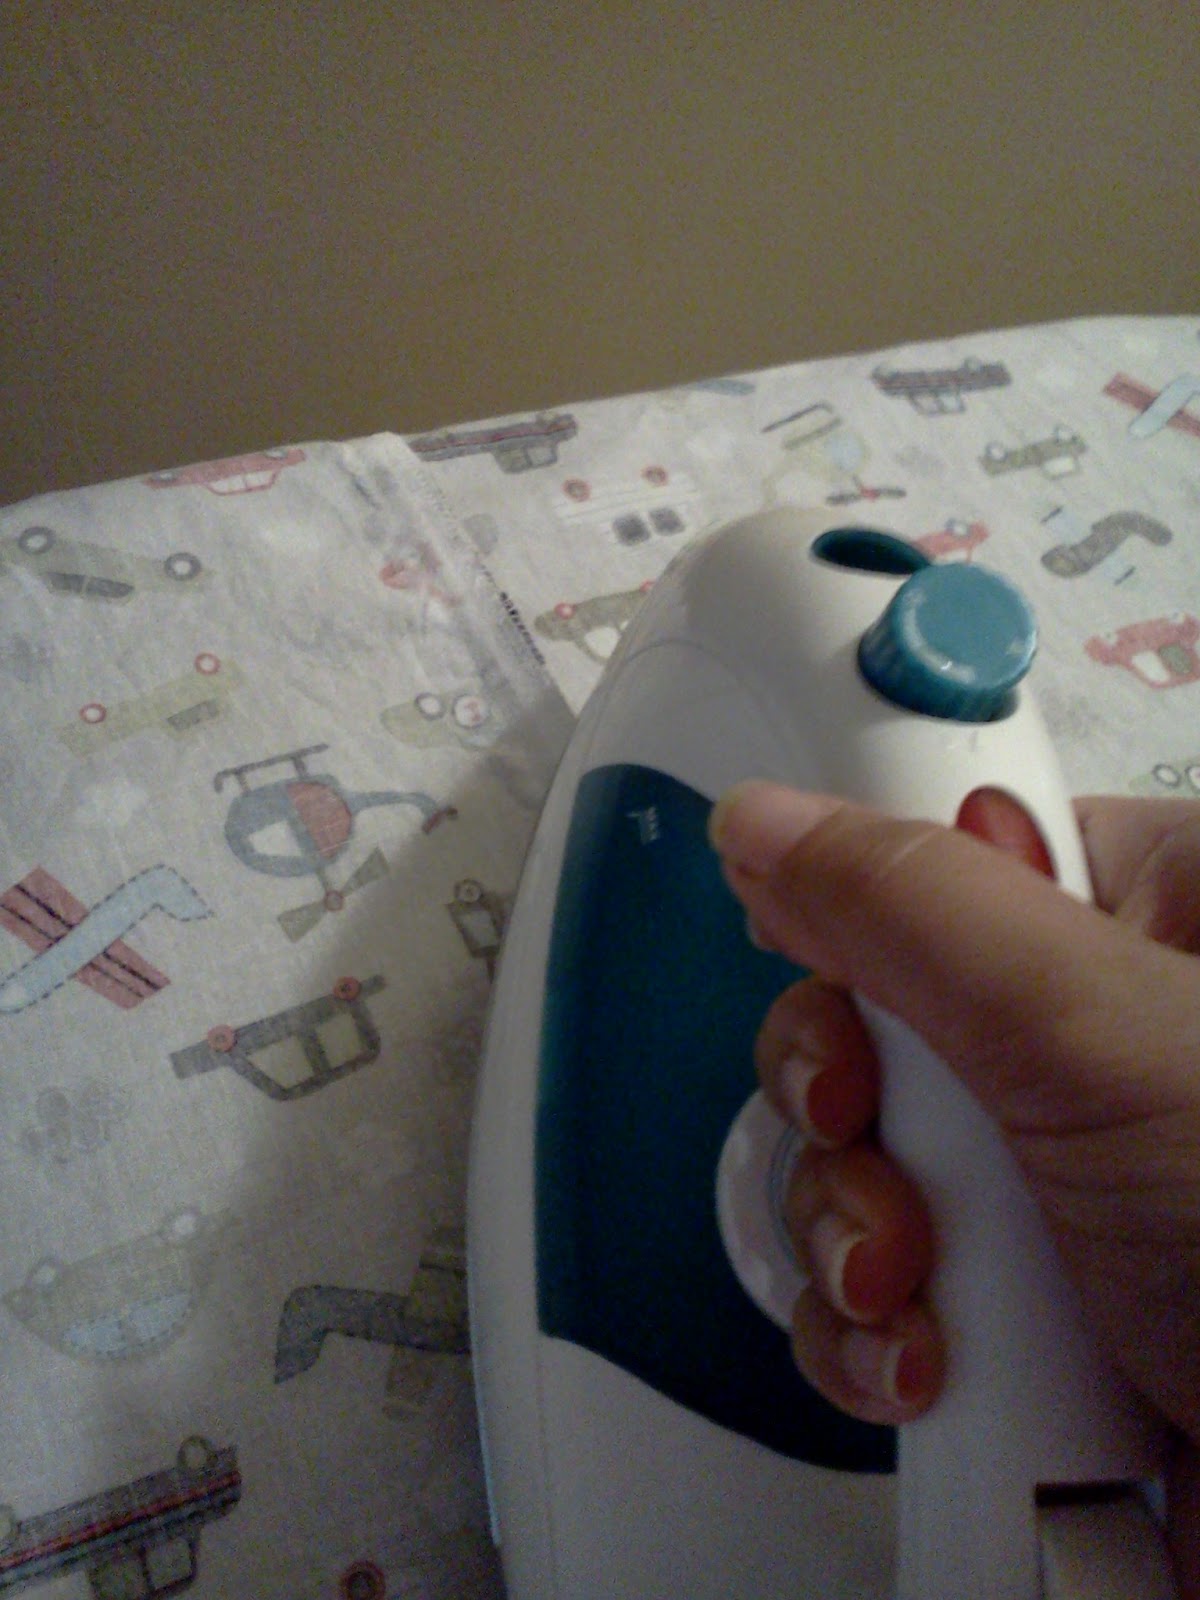
Loooots of ironing happened.

At one point I had a darling assistant keeping an eye on things.

Annnnd the finished product!  

Okay, so the duvet cover project.  Here are some notes for those who may be considering undertaking this or a similar project.  As I said before, it was not difficult per se.  I used very basic sewing skills and was dealing with all straight lines.  It was the amount of fabric that was challenging.  It's just a lot of fabric to handle!  I read a lot of tutorials before I started this project.  The ones that I pulled the most info from are:

Sewing 101: Making a Duvet Cover

DIY Duvet Cover Tutorial

Tutorial: Duvet Cover (this one gave me the great idea to use a laser level to aid with some of the cutting.  Brilliant!)

I used Vroom Vroom Vehicles Bright fabric for the top and a flat sheet that I picked up for less than $5 at Walmart.  Using the flat sheet was GREAT because not only was it cheaper than buying fabric off the bolt, but also it was the correct size minus ~4-inches in length.  I didn't have to do a ton of cutting or piece panels together like I had to do for the top.

For the closure I use some plastic snaps that I had on hand and sewed them into the bottom seams.  It worked out really well and because I already had them didn't add to the cost of this project.  Winning all around!

So that took up most of my Saturday.

Sunday my niece came over to play and Mark and my dad and brother moved a hand-me-down washer and dryer set for us.


Pretty sure that was a semi-forced hug, but someone has to take control of the situation :)

Swings were swung (for hours!), lots of running happened, bubbles were played with, and our house was a big mess, but the kids had a ton of fun and I'm sure all will sleep very, very well tonight!


Friday, January 18, 2013

Pregnancy #2: 40 weeks, 4 days

It's finally happened.  I've hit that magical tipping point of pregnancy where this baby making its exit by any means necessary seems far more appealing than staying pregnant just one more day.  It happened quickly for me because as of last week I was perfectly content, still very much enjoying my pregnancy, and soaking in the last few days I had left until our world was turned upside down by an outside baby.

Welp, that's over with.  I'm ready for the outside baby.  I'm done being pregnant.  I'm tired of being in constant pain.  I'm ready to be able to roll over in bed without having to mentally prepare myself for the task, involving multiple movements to actually accomplish the roll, and ending up with tears in my eyes from the pain associated.  I want to be able to easily get up from the couch and walk around normally and without pain.  I'm tired of worrying about whether breastfeeding is going to be possible this time, I just want to get there and start working on it.  I'm absolutely exhausted by worrying about how and when this baby will arrive and whether she will cooperate with her positioning.  I just want it to happen and be done with it.  I know that I'm going to have a period of recovery, one that will probably longer than originally anticipated, but at least I'll be working towards feeling better rather than just feeling worse and worse.  I'm just so over the whole thing at this point and it's definitely no longer enjoyable.

I feel a little cheated in that I spent this entire pregnancy feeling so hopeful and sure and positive and now in a matter of days I've done a total about face and headed to Negative Town, but I guess it is what it is.  Every day is just so emotionally and physically exhausting right now.  Good thing I know we're nearly at the end one way or another.

Don't worry, no plans to prematurely evict this little one before her time, but I'm sure hoping she decides to make her appearance soon.  We're still doing what we can to encourage her to flip back to a head down position, but every day that passes I'm losing hope that it will actually happen.  All we can do at this point is wait (and worry.  I'm trying not to, but it's really hard given the circumstances).  If we make it to Monday (41 weeks) we'll see what my midwife has to say. 

In other news, in the stand-off of which would be finished first, the blanket or the baby, the blanket won:


Blankets.  Harder to photograph than one would think!  This blanket was crocheted using the Cuddle & Coo pattern from Red Heart.

Saturday, January 12, 2013

Pregnancy #2: 39 weeks, 5 days

We're getting closer!  Like... crazy close.  It all feels very surreal, but we could be welcoming this baby into the world any day now.  At most, it won't be longer than another couple weeks.  Just crazy!

I'm feeling better about baby's arrival since we've had time to prep.  The tiny clothes are washed and folded and put away.  The covers for all the baby items have been washed.  Most of the projects I wanted to get done before baby's arrival have been completed.

Recently, I made 2 muslin swaddling blankets:


They're actually made out of cotton gauze, but they're inspired by the popular aden + anais muslin swaddling blankets so I'll call them muslin.  Super simple project.  They're just two 1 1/4 yard squares of white cotton gauze that I hemmed on all 4 sides and then dyed with Rose RIT dye.  Easy peasy and after sale and coupon each blanket cost $4.50 (and that's including the dye).  Compare that with the name brand blankets which start around $35 for a 4-pack.

And my other recent project is a set of a dozen cloth wipes:


They're flannel on one side and terry cloth on the other.  I actually have had the fabric for this project since Jack was a baby, but ended up not actually making the wipes because we ended with plenty of wipes for him from the baby washcloths that we use.  But now, with two babies in diapers, I'm going to need more so this is a good start!  I think I used 1/4 yard of each fabric and got a dozen generous sized wipes.  I just turned and topstiched the fabric and they're nice and plush too!

I'm currently working on my last baby project, which is a crocheted baby blanket.  It's about halfway done right now so we've been discussing whether I will finish the blanket first or baby will make her arrival first.  It could definitely go either way, we'll see!

We still need to pack hospital bags.  Surely I'm not the only pregnant woman to wait til the last minute to do this?  I can't remember when I packed my bags last time either.  I'm sure it wasn't very early.  Mark says he feels like we packed them right before leaving for the hospital.  Hmm... maybe we'll work on this today.  Especially considering we have 3 people to pack for this time, not 2!

I had my 39 week midwife appointment on Tuesday.  Everything looks great.  Baby seems to be measuring right on track still (based on fundal height and my midwife feeling baby), her heart rate is perfect, my blood pressure is good, weight is good, I haven't had any swelling, I'm still relatively comfortable, and I haven't even had any heartburn to speak of (whereas last time, I didn't really have any throughout my pregnancy, but the last few weeks it was terrible and constant!  So glad I seem to have avoided that this time!).

Oh, also, my belly button has decided to kind of halfway pop out.  This happened maybe a week or so ago.  With Jack my belly button never popped, just got really, really flat.  This time it seemed like the same thing was going to happen, but lo and behold it seems to be popping out a little bit.  Jack likes to poke it and has decided that it looks like a cherry (???).   

I haven't had a cervical check yet.  My practice doesn't begin routine cervical checks until 40 weeks unless I really want it and I was planning to decline checks this time even if they wanted to do them.  They don't mean anything as far as when you will go into labor (as evidenced by the fact that I held off on checks until 38 weeks last pregnancy and when I was checked at 38, 39, and 40 weeks I was 2cm dilated and 80% effaced every time leading up to labor at 41 weeks.) and I trust that my body is doing exactly what it needs to be doing in preparation for this baby.  My midwife did mention that if I still have an inside baby at my 40 week appointment (which I will actually be 40 weeks, 1 day for the appointment) they will want to do a cervical check just to see what's going on (I'm fine with that).

She also mentioned that I might consider allowing them to do a membrane sweep to jump start things.  I'm not planning to allow them to do this.  I tried that last time at my 40 week appointment and it was mighty uncomfortable for me then just left me feeling uncomfortable and crampy for the next day, maybe two, while still sporting a big pregnant belly for another week.  It didn't send me into labor and I'm of the opinion that it's not going to work unless your body is ready for labor anyway.  Might as well wait for it to start on its own rather than being uncomfortable leading up to it!  We'll see what happens between now and then, but barring some serious changes in my comfort level I think we'll just skip it until at least 41 weeks and then reevaluate.

Obviously we're getting closer though.  Wednesday evening I started feeling some very mild menstrual-like cramping and then I had a few (like... 3) mild contractions.  I guess they would still be considered Braxton Hicks contractions, but they're definitely ramping up.  I've felt Braxton Hicks contractions since my 2nd trimester, but it was only tightening that I felt.  Now, they are stronger, and I'm feeling some downward pressure with them as well.  I'm not really sure if the contractions are just stronger so they're causing that feeling, or baby is lower so I'm feeling the pressure when the contractions happen as they have been, or if the contractions are different and are actually pushing baby downward.  Or, maybe some combination of all of the above!

I've had these stronger contractions every day since Wednesday and with more frequency.  Last night I had one every 40 minutes or so from early evening until I went to bed.  They seem to come at the end of the day, which is also playing into my feeling that my labor will start in the evening again.  Progress!

I find these contractions SO very interesting.  I never noticed any Braxton Hicks with Jack, and certainly nothing like this with the contraction and pressure together.  I know not everyone feels them, especially first time moms, so this has been a new experience for me.  The very first contraction I had with Jack was the start of my labor and things progressed pretty quickly to active labor from there.  And it was super painful and I didn't even notice tightening, just super amounts of pain in my pelvis which had been bothering me.  That's how my whole labor was.  So this time, it's nice to actually experience the feeling of a normal contraction that's not painful.  It's reassuring to me as well that things will be different this time and build more gradually.  Even though I'm a second time mom, I feel like I had never experienced a normal contraction before because of the complications with my pelvic pain last time.  It's a very neat feeling at this point to feel my body working the way it should!
   
Honestly, at this point I'm just trying to enjoy this last bit of my pregnancy, and the last bit of time we have as a family of three.  Maybe Mark is just taking too good of care of me!


Friday, November 30, 2012

bumGenius 3.0 Snap Conversion

I finally decided to take the plunge and convert our cloth diapers from aplix (velcro) to snaps.

After more than 2 1/2 years of heavy use these diapers have seen better days.  They're in pretty good condition considering the amount of wash and wear they've seen.  All of the fabric (including the waterproof PUL layer) is in great working condition, we don't have stains, and the inserts are still fine, but I found myself faced with some necessary maintenance especially considering we're planning to use these diapers with our next little one.  Cloth diapers are a long term investment, but they're very frequently used and washed and they do wear out just like any other piece of clothing.  For us, we're having the typical problems of the aplix wearing out and the elastics around the legs and back becoming too relaxed.

When we started cloth diapering we tried out several different brands of diapers before settling on bumGenius pockets.  At the time, bumGenius pockets were only available with aplix (they have since moved on to their 4.0 version, which is available in both snaps and aplix), but this was fine with us because we wanted the aplix.  Even though I'm converting to snaps now, I still think that aplix is a little better for ease of use and getting a perfect fit.  However, we do have some snap diapers (Flips) so I can say that the snaps really aren't a problem to use either and snaps are definitely the way to go for long term functionality.   

We purchased the aplix knowing that it would eventually wear out and we would need to do something about it.  We didn't have any problems with it for probably the first 2 years (aside from the laundry tabs not working very well, but as far as functionality of diapers, no issues) and then the tabs on our most frequently used diapers (we have specific colors set aside as night and nap diapers because we stuff them differently) started to not work so well.  We would end up with diapers coming loose while Jack was sleeping, which equals leaks, which is obviously not a good thing.  Especially now that the weather has turned cold and Jack is back in footie PJs (and therefore doesn't have the waistband on his PJs to help hold the diaper together) it's become quite frustrating and the rest of his diapers are starting to have the same problems.  Something needed done right away!

Now, back when we first noticed that the tabs weren't working as well, I notified Cottonbabies (the diaper manufacturer) of the problem and they sent me refresher kits with their new and improved 4.0 aplix free of charge.  The refresher kits are a great option if you still want to stick with aplix.  It contains new tabs, laundry tabs, and elastics to give your diapers a face lift.  I went ahead and used one of the kits on a night time diaper and while it was totally do-able, I realized that to replace the aplix on all 23 of our diapers it was going to be quite a project.

So... I ran out of steam and stopped there.  I'm glad that I did though, because several months down the road I'm discovering that replacing the aplix probably isn't our best option.  The 4.0 aplix and new laundry tabs have held up really well, I have no complaints with that however, looking at the wear to the landing strip across the front and the way that the new tabs are sticking to it, I see that there will likely be issues with that down the road and replacing the landing strip isn't exactly recommended as it's quite a process and involves taking the diaper apart.  It's not something I want to tackle.  Not to mention, I really want to tackle this issue and have peace of mind that it's going to be a long term solution.  Even with the improved aplix, it's just never going to be as durable as snaps and even IF the landing strip holds up (which I don't think it will, at least not long term) the aplix is eventually going to wear out again and I'm going to have the start the process all over again.  And that would not make me happy.

And so we decided to go with snaps.  It's still going to be a decent project to get all of our diapers converted, but at least I'll only have to do it once!  I started out by shopping around as there are people who will do the conversion for you, but it's not cheap.  And I see why it's not now that I've started the process.  It takes a decent amount of work.  It's not difficult, but time consuming.  After pricing it out I decided it was worth the time to do it myself (of course, when do I ever pay someone else to do something that I can do for myself more cheaply?  The answer to that is erm... never.  At least not when I can avoid it.).

So I got online and researched what supplies I would need to do the conversion.  KAM Snaps is pretty much the place to go for all your snap needs.

First, I needed snap pliers to set the snaps.  They also have snap presses, which I can totally see why those are nicer, but the pliers are much more affordable so I went with that option.  I also got an awl (the tool used to poke holes in the fabric).

Then, I needed snaps.  They actually have snaps that match bumGenius colors so you can either choose to do a perfect match or you can do whatever color you want.  I ordered size 20 shiny plastic snaps, which are the ones available in the matching colors.  I decided to do 20 snaps across the front of the diapers (2 rows of 10, which is what Cottonbabies actually does with their snap diapers now that they have that option) and two snaps on each wing.  For this formulation you need 24 caps, 20 sockets (the female piece), and 4 studs (the male piece) for each diaper.  The snaps can be purchased either in sets (which are comprised of 2 caps, 1 stud, and 1 socket) of 100 or you can choose to purchase the pieces individually in groups of 100.

I decided to just order them in complete sets because I wasn't 100% sure what I was going to do and how many of each part I would need, plus I needed a variety of colors.  I think it works out to be about the same price-wise.

So anyway, for everything I needed (minus some Black Friday discounts) I was able to get all of the supplies for $45.86 shipped.  And I ordered on a Friday and received my package on Monday.  Definitely a good experience!  The price works out to ~$2 to convert each diaper and obviously I'll have some parts leftover.  I also discovered that I maybe have over ordered by just a little bit.  This is quite a bit cheaper than paying someone to do the conversion for you, especially when you consider the cost of shipping both ways.

My first diaper took quite a while to finish.  First, I started with the diaper that I had switched out the aplix on and WOW did I do a good job of attaching that new aplix!  It took forever for me to detach the aplix (you'll also need a seam ripper if you don't have one of those).  Once I finally got everything removed I wasn't sure exactly how I wanted to configure the snaps.  As I said, I ended up basing it on the diapers Cottonbabies now offers in snaps (like the Flips that we already own), but the problem with that is the Flips, bumGenius 4.0s, etc. also have very slightly different measurements than the 3.0s so I had to keep that in mind and couldn't copy their snap placement exactly.

After playing around with it for a bit I decided on 2 rows of 10 snaps across and 2 snaps on each wing.  To do this I have the first row of snaps placed 3/4" down from the top of the diaper, the next row of snaps is 1" apart (all of my measurements are done to the center of the snap), and each snap is 1" apart from the next.  For the wings the snaps are about 1" apart, but I really had to eyeball this because I found that the wings are a little less consistent in shape (probably the nature of the stretchy fabric), but luckily because it's stretchy it's very forgiving.  I don't know if any of this makes sense, but when I was looking at conversion tutorials I couldn't find a lot that talked about specific measurements so I thought I would share mine in case it can help someone else!  Also, KAM Snaps does have tutorials on their website with a few different configurations that are helpful to reference.

So anyway, the first diaper was definitely a process since I was trying to figure out what I was doing, but after that I made a template with my desired measurements and the process goes a lot quicker now.  It's still a process, but now I know what I'm doing, which makes quite a bit of difference!

Here are two of the diapers I have converted:


And here's what it looks like opened up:


3 down, 20 more to go! 

(Ugh.)

And then on to replacing the elastics, which I am NOT looking forward to.  It seems like quite a process (double uggghh), but I'm going to hold off on that until Jack is done with the diapers so the new elastics stay nice and tight for tiny baby legs.

Wednesday, September 21, 2011

Cloth Napkins


I feel like I've been working on this project forevah!  I finally finished a set of cloth napkins! 

This was not at all a difficult project and the sewing portion of it didn't take long at all, but the cutting took a bit of time and then I spent what felt like decades pressing the seams!  I actually had to split it up into three sittings. 

Also, I learned that starch is your bestie when doing something like this.  I'm still feeling my way around sewing and being such a beginner I don't realize some things that apparently everyone else just KNOWS like the fact that if you don't starch a seam like this during pressing it's going to take twice as long AND once you discover starch, you're going to have to go back and redo all the pitiful seams you did originally. 

STARCH! 

Don't forget it.  You'll thank me later.

So anyway, yes, the pressing took a long time, but obviously this is yet another learning experience for me and I'm quite happy with how things turned out!  I've been wanting to make some cloth napkins for quite a while.  We use cloth paper towels (that's an oxymoron, but you know what I mean), or the more trendy name: "unpaper towels", and are so happy with them, but we've been continuing to throw money away on paper napkins because I knew that I wanted to DIY a set for us and hadn't made time for it before now. 

Well, NO LONGER! 

Because look at these babies!  Aren't they the cutest cloth napkins you've ever seen?! 


I even chose a fabric that matched our kitchen. 

And another reason that it took so long is that I made FIFTEEN of them.  That's a lot of napkins.  But I wanted to be sure that we had enough and you have to think, some days we eat 3 meals as a family, so we could easily go through 6-9 napkins right there and I don't want to have to wash them everyday. 

I even did some very fancy schmancy (to me, at least!) mitered corners on these.  Definitely a learning experience, this project. 

I highly, highly recommend whipping up a set of these.  Cloth is where it's at.  They're not at all difficult and you'll end up with something very useful, cute, and inexpensive that will save you money!

This whole project cost under $5.  I never would have been able to purchase 15 napkins for that price.  I bought 2 yards of 100% cotton fabric (Originally $4.98, on sale for 50% off) and I had all the rest of the supplies including coordinating thread (look at me building my sewing stash!).  I used Skip to My Lou's tutorial.  I cut my fabric into 12" x 12" squares, which left me with a finished size of  11" x 11".  I'm finding it to be a good size, and it maximizes the number of napkins you can get out of a yard (or two) of fabric.

Here's what they look like opened up from the back:


And my fancy mitered corners:


And in their new home ready to go:


Oh, and another tip if you're planning to do this project, don't forget to pre-wash your fabric!  That way you don't end up with any unexpected shrinkage or wonky seams or anything.  I discovered that tip in time for my last project :D

Saturday, July 30, 2011

Wet Bag!


My sewing abilities seem to be improving slowly but surely.

Last year, I initiated myself into the world of sewing with a minky cover for Jack's changing table pad (which turned out really well!) and a PUL pail liner for his diaper pail (which turned out to be functional - still going strong! - if not the most beautiful thing ever).

For Easter this year I made Jack a sock monkey, which was half hand sewn and half machine sewn, that I was very happy with!

I don't have pictures of the other projects, but I do have a shot of Mr. Sock Monkey:


Pretty cute, huh?

For my next trick I made a lined wet bag!  This sewing project was considerably harder than my previous attempts and involved a zipper - definitely new territory - but I'm quite pleased with how it turned out!  Again, maybe not the most beautiful wet bag ever, but I think it'll be nice and functional. 

For those who don't know, a wet bag is a waterproof bag made to hold wet items.  In this case, it will be holding used cloth diapers.  We already have a small Planet Wise wet bag, which we've been really happy with, but it only holds a maximum of 2 diapers.


It's perfect for a few short hours away from home, but I often find myself wishing we had not only a secondary bag for when the first one is dirty, but also one that has a little larger capacity for when we're away from the house for an extended period of time.

A medium wet bag in the brand we already have costs $16.50 plus shipping.  Not overly expensive for the amount of use you get out of it, but I decided I'd try my hand at making my own!

Here are the results:


Looks pretty good to me!

I used Skip to my Lou's Lined Zippered Pouch Tutorial to help me figure out what I was doing.

I ended up with a wet bag which is 12x16-inches with a PUL inner, and cotton outer.  I expect that it will hold 6-8 used diapers.

Cost breakdown:

 ~ Cotton outer fabric - already had this left over from another project
 ~ PUL inner fabric - already had this left over from making Jack's pail liner
 ~ Zipper - $1.19
 ~ Zipper foot - $6.60.  I did buy a zipper foot for my sewing machine with this particular project in mind, however since I'm sure I will be using it again in the future and isn't specific to this project I don't really think it should be counted toward the total cost of this wet bag, even though Mark does :P

So $1.19, if you're me, $7.79 if you're Mark

Either way, I definitely saved some money and gained some sewing confidence!

Next up, cloth napkins!

Wednesday, January 26, 2011

Homemade Dishwasher Soap


Ditching commercial cleaning products in your household has obvious environmental and health benefits, but a bonus that I absolutely LOVE is mixing up your own products is so much cheaper than, yet just as effective as, their store bought counterparts!  No nasty chemicals AND better for your budget.  To me that's  a win-win situation!

I've previously shared my green cleaning tips as well as the cloth diaper soap that I like to use (which, by the way, we've been using for 7-8 months now and I still love!) and today I'm going to share a recipe for dishwasher soap that we've recently started using. 

This is a quick, cheap recipe to mix up and it works really well!  Now, I'm not going to say that it gets everything spotless, but prior to this we were using cheapie store brand detergent and this recipe cleans just as good if not better than that stuff.  I can't honestly tell you how it would compare to a name brand product, but I can assure you that it's cheaper than the name brand stuff and it's much better for you and your family! 


Homemade Dishwasher Soap
Source:  diyNatural

1/2 cup Borax
1/2 cup Washing Soda (if you have trouble finding this Penniless Parenting has a neat tutorial on how to make your own from regular old baking soda!)
1/4 cup Citric Acid (or you can substitute 10 packets of Lemon Kool-Aid)
1/4 cup Kosher Salt

I like to mix this up and keep it in an old 32 oz. yogurt container.  You will need just 1 tablespoon-sized scoop of powder per load. 

Cost = $0.08 per load!

Let's talk about why homemade soaps are better for you. 

According to poison control centers, dishwasher detergents are the #1 cause of accidental poisonings in the household.  All you have to do is look at the outside of a bottle to see a warning that says: harmful if ingested.  Yet we're washing our dishes and utensils - things that we put our food on and place in our mouths everyday - with these products and surely we're aware that soaps leave a residue behind, but they also release toxic vapors into the air during use.

What harmful chemicals are found in commercial dish detergents?

Sodium Lauryl Sulfate and Sodium Laureth Sulfate (surfactants)
Chlorine
alkyl phenoxy ethanols (APEs)
dichloromethane (DCM)
diethanolamine (DEA)
dioxane
phosphates

Among these are poisons, carcinogens, endocrine disruptors, and compounds that can cause skin, eye, and lung irritation.

And, as I mentioned previously these chemicals are all much harsher on a baby's underdeveloped system than on adults.

If you are interested in avoiding nasty chemicals found in a lot of commercial cleaners, but don't want to go the DIY route there are other options out there that you can purchase at the store, I just don't have any firsthand experience with them!

Friday, December 31, 2010

Christmas 2010


I think this was the busiest Christmas yet, but it was a very special one as it was Jack's first!

3 separate family Christmas celebrations in one week's time + a brunch at my parent's house the morning after Christmas + the usual hustle and bustle of getting ready for the holiday + caring for a baby = one tired momma!  (And daddy too!)

I love holidays and I hope to establish fun traditions that will make Adult Jack look back on his childhood Christmases fondly as I do mine. 

Being that Jack was days away from being 10-months-old on Christmas morning we really didn't expect that he would know what was going on or care, but we were pleasantly surprised by his obvious excitement!  He had so much fun opening his gifts and playing with his new toys.


The Monday before Christmas we went to see Wildlights at the zoo.  Probably more for my enjoyment than Jack's or Mark's, but it was a fun trip.  We bundled up to stay warm and only stayed for an hour or so.


Before Christmas, I was busy working on stockings for the family.  Since we needed to add on to our collection this year anyway I decided to make us all new ones. 


I think they turned out pretty cute despite some trouble with my stocking.  Originally, I was planning to make a red stocking with white snowflakes.  Against my better judgement I only purchased one skein of the red yarn I needed and a week before Christmas when I ran out I couldn't find anymore despite visiting several stores.  So... I had to frog all my work (3/4 of the stocking!) and start over with a new idea.  I settled on the stripes which turned out pretty cute and a Christmas tree instead of snowflakes.  Next year I'll add some embellishments to the tree. 


And this year's special ornament is a very special one made with Jack's handprint!


I made it with salt dough (recipe below) and I'm pleased with how it turned out.  I'm sure this will be an ornament that we cherish forever.


2010 was a great year for us and I can't wait to see what 2011 will bring! 

Happy New Year everyone!   


Salt Dough Ornaments


1-cup AP Flour
1/2-cup Table Salt
1/2-cup Water


Mix ingredients together then turn out onto the counter and knead until fully combined. 

Roll out to desired thickness and cut with cookie cutters or make handprints. 


Use a toothpick or straw to make a hole at the top (to add yarn or ribbon to hang). 


Bake on an ungreased cookie sheet in a 250-degree oven for 2-8 hours (depending on size and thickness of ornaments, it took me 8 hours) until dough is completely dried out.  


Once ornaments are dried they can be painted with watercolor or acrylic paint, or decorated with glitter and glue, if desired. 


String with yarn or ribbon and hang on a Christmas tree or add to a gift as a fun embellishment.

Thursday, November 11, 2010

DIY: Yarn Wreath

With the passing of Halloween it was time to take down the Candy Corn Wreath and move on to something else.  It's too early for Christmas decorations so I wanted something Autumn-y.  This is what I came up with:


A yarn wreath featuring Fall colors! 

I used a 16-inch straw wreath form (you could also use foam if that's what you have, but if you're buying something new specifically for this project, I'd recommend the straw form because it's cheaper.  A foam form would definitely be easier to cover though because it's smooth.) and wrapped it with a multi-colored yarn.  It took a whole skein and I actually ran out towards the end (oops!) so I used a little bit of brown yarn that I had to finish it off.  I think it looks okay though.  If you're careful with your wrapping you could probably get the whole thing covered with a single skein, but I had never done this before so I kind of over-wrapped in the beginning.


Then, I crocheted a few flowers with coordinating yarn and attached them with my hot glue gun. 

I really like how it turned out and it was inexpensive to make.  This should take us right up to Christmas time!

Thursday, October 21, 2010

DIY: TuTu Tute!

How to make your very own TuTu!

First, you'll need some supplies:

A ribbon, cut to length and tied off.  You'll want to make it the right size for the waist you're making it for, also accounting for some extra length so it can be tied into a bow.  You could also make this using an elastic waistband, but I didn't so I have no advice about that!


Tie the ribbon off towards the ends to give you a guide on the placement of the tulle pieces as well as to keep them from sliding off the end of the ribbon once they're on there.  The space between the two knots will become the actual waist-area (if that makes sense) and the ribbon outside of the knots will be what's used to tie the tutu on.

Next, you will need some tulle.  This kind, which can be found in the wedding area at both JoAnn Fabrics and Michael's is handy because it's already cut to width.  With this, you only have to worry about cutting length.  You could also use tulle by the yard (you would likely need several yards), but then you'd have to worry about rolling and cutting by width and length.  Just buy the rolls if possible!  I used purple and pink and needed the majority of both rolls to complete this tutu which I'm making for a 2-year-old.  The amount of tulle you will need will ultimately be determined by the size of tutu you're making. 


Now, cut A LOT of pieces of tulle!  I think I cut nearly 100 between the two colors.  I measured the pieces to be approximately 18-inches in length because they will be halved once tied to the ribbon making 9ish-inch pieces in the skirt.


Take your pieces of cut tulle and begin tieing them onto your ribbon.  Fold a piece in half and then loop it through itself around the ribbon.


Pull it tight and you'll have something that looks like this:


Now push your knotted tulle down to join the rest of your knotted pieces:


And see, I just alternated colors.  Every so often I threw in a skinny ribbon that I had in my craft stash using the same knotting technique as I did with the pieces of tulle.  It added an extra little splash of color and a different texture.


Keep knotting and squishing the tulle close together - remember I did this about 100 times! - and you'll end up with this:


Cute, right?  Perfect for a little girl or toddler's party dress, or a fun dress up prop! 


And, the possibilites are endless!  You could make holiday themed tutus - black and orange for Halloween, red and green for Christmas, red, white, and blue for 4th of July - or you could even do princess themed ones - baby blue and white for Cinderella, royal blue, yellow, and red for Snow White.  I think it's a great addition for any little girl's dress up wardrobe! 

Wednesday, October 20, 2010

A Few Projects

I've completed a few crafty projects over the last couple of weeks so it's time to brag about them! 

First, 2 crocheted hats for Jack!

A Buckeye-inspired Toque (Yep, that's right, I busted out some Canadian, eh?):


And an adorable Pumpkin Beanie that was great for a breezy, Fall day at the Pumpkin Patch:


The first hat may have a few holes in it, but I'm quite proud of my sophomore project - the Pumpkin Beanie.


In honor of Halloween it was time to change out our OSU Football-inspired wreath for something a little more festive.  Enter this Woman's Day inspired Candy Corn Wreath:


And last but not least, a Tutu worthy of a 2 year old princess!  I made this to give to my niece for her 2nd birthday:


Please note the creative use of an accent lamp in this photo :)  I'll post a tutorial on how I made this tomorrow!